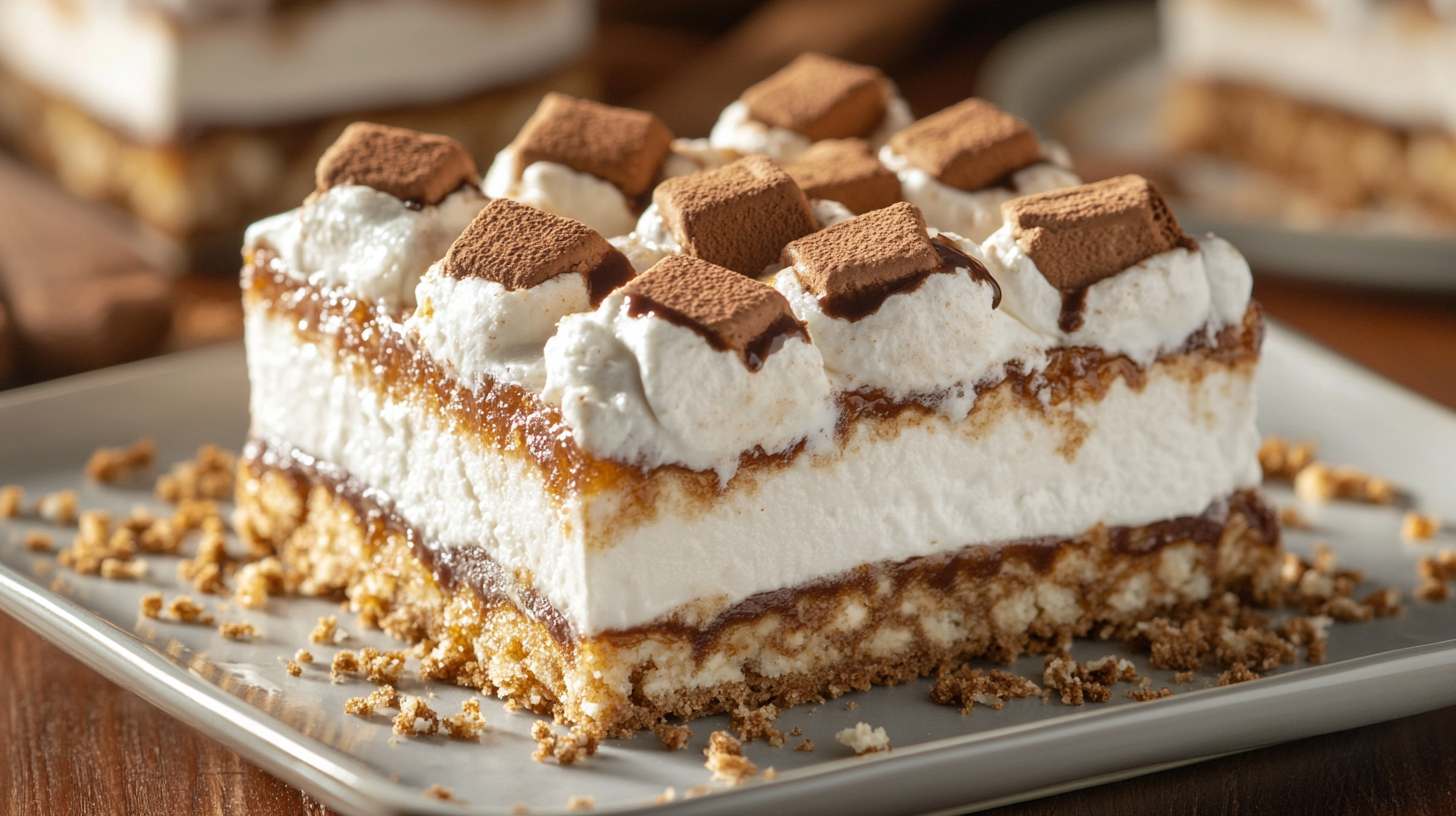
Picture this: the nostalgic flavors of toasted marshmallows and chocolate combined with creamy cheesecake, all nestled on a buttery graham cracker crust. These Frozen S’mores Cheesecake Bars are a genius mash-up that brings the campfire magic to your freezer! Trust me, they’re about to become your new favorite summer dessert – no campfire required.
Why You’ll Love These No-Bake S’mores Cheesecake Bars
You’re going to absolutely adore these bars because they combine the best of both worlds – the nostalgic taste of s’mores and the decadence of cheesecake. They’re perfect for making ahead, and since they’re frozen, they’re the ultimate refreshing treat on hot days. The best part? No baking required for the filling, which means your kitchen stays cool and you get to enjoy these dreamy bars sooner!
Essential Ingredients
- Graham crackers – Creates that classic s’mores base we all know and love, perfectly crushed to form our buttery crust
- Butter – Binds our crust together and adds that rich, buttery flavor that makes everything better
- Cream cheese – The star of our cheesecake filling, make sure it’s at room temperature for the smoothest results
- Heavy cream – Whips up to create that cloud-like texture in our filling
- Marshmallow fluff – Brings that signature s’mores taste without the mess of melting marshmallows
- Chocolate – Both melted into the filling and as chunks, because there’s no such thing as too much chocolate in s’mores
- Vanilla extract – Enhances all the flavors and adds that extra touch of sweetness
- Salt – Just a pinch to balance all the sweet elements
- Mini marshmallows – For toasting and garnishing, because we eat with our eyes first!
- Additional chocolate bars – Chopped up for garnish, creating that irresistible s’mores look
Prep Time for No-Bake Cheesecake Bars
- Prep Time: 30 minutes
- Chill Time: 4 hours
- Total Time: 4 hours 30 minutes
Step-by-Step S’mores Bar Assembly
- Line a 9×13 inch pan with parchment paper, leaving overhang for easy removal.
- Combine graham cracker crumbs with melted butter, press firmly into the pan.
- Beat cream cheese until smooth, gradually add powdered sugar.
- Whip heavy cream separately until stiff peaks form.
- Fold whipped cream into cream cheese mixture with vanilla extract.
- Gently stir in melted chocolate until marbled.
- Spread mixture over crust.
- Top with mini marshmallows.
- Freeze until firm.
How to Make Frozen S’mores Cheesecake Bars
Ensure your cream cheese is completely softened to avoid lumps in your filling. When melting chocolate, use a double boiler or microwave in short bursts to prevent burning. For the perfect slice, dip your knife in hot water between cuts.
Mix It Up
Try using different chocolate varieties like dark or milk chocolate. You can also add crushed graham crackers between layers or swap mini marshmallows for marshmallow fluff.
Perfect Partners
Serve with hot fudge sauce, caramel drizzle, or fresh berries. A cup of hot coffee or cold milk makes the perfect beverage pairing.
Busy Day Hero
Make these bars up to a week in advance and keep them frozen until needed. They’re perfect for parties or when unexpected guests arrive.
Work Ahead
The crust and filling can be prepared separately a day in advance. Store the filling in an airtight container in the refrigerator until ready to assemble.
Storage Guide for Frozen Cheesecake Bars
These bars freeze beautifully for up to three months. Wrap individual portions in plastic wrap, then store in a freezer bag for easy single servings.
Everyone’s Happy
Kids love the familiar s’mores flavors, while adults appreciate the sophisticated cheesecake twist. It’s a crowd-pleasing dessert that bridges generations.
Good For You Too
While this is definitely a treat, you can make mindful choices like using reduced-fat cream cheese or dark chocolate for added antioxidants. Portion control is easy with the bar format.
Easy Clean Up
Line your pan with parchment paper for effortless removal and minimal cleanup. Use disposable piping bags for neat topping application if desired.
Switch It Up
- Make them gluten-free using gluten-free graham crackers
- Create a mint chocolate version with peppermint extract
- Add a layer of peanut butter for a nutty twist
- Use chocolate graham crackers for extra chocolate flavor
Simply Perfect
These Frozen S’mores Cheesecake Bars strike the perfect balance between familiar comfort and elegant presentation, making them ideal for any occasion.

Frequently Asked Questions About S’mores Cheesecake Bars
- Can I use regular marshmallows instead of mini ones?
Yes, you can use regular marshmallows cut into smaller pieces. However, mini marshmallows are recommended as they’re easier to distribute evenly and provide better texture in every bite. Just remember to roughly chop regular marshmallows if using them. - How long do these need to thaw before serving?
Let the bars thaw for about 10-15 minutes at room temperature before serving. This allows the cheesecake to soften slightly while maintaining its structure. If it’s particularly warm, 5-7 minutes might be sufficient. - Can I make these without freezing them?
While you can make a regular s’mores cheesecake, this specific recipe needs freezing to achieve the right texture and make it easier to cut clean slices. The frozen version also provides a refreshing twist on the classic dessert. - Will the marshmallows freeze well?
Yes, marshmallows freeze well and maintain their texture when thawed. They might become slightly firmer when frozen but will return to their original consistency as they warm up. - Can I toast the marshmallow topping?
Yes! You can briefly toast the marshmallow topping using a kitchen torch just before serving. Make sure the bars are still quite frozen when you do this, and work quickly to prevent excessive melting. - How do I prevent freezer burn?
To prevent freezer burn, wrap the bars tightly in plastic wrap, then aluminum foil, or store in an airtight container. Make sure to remove as much air as possible if using freezer bags. It’s best to consume within 3 months for optimal quality. - What’s the best way to cut clean slices?
For the cleanest cuts, dip a sharp knife in hot water and wipe dry between each slice. You can also run the knife under hot water for 30 seconds before cutting. Make sure to clean the blade between cuts to prevent the layers from mixing.
Discover More Irresistible Desserts
If you love no-bake desserts, you might also enjoy these No-Bake Banana Split Cake, a fruity and creamy delight perfect for any occasion. For a peanut butter twist, check out the Thick and Chewy Peanut Butter Cookies, an irresistible treat with a rich, nutty flavor. If cheesecake is your go-to dessert, these Luscious Lemon Raspberry Swirl Cheesecake Cups offer a tangy and refreshing variation. Craving another frozen snack? The Blueberry Swirl Yogurt Bites provide a healthy and delicious alternative. And for those who love the combination of chocolate and crunch, the Caramel Fudge Crunch Bars will be a fantastic addition to your dessert collection.