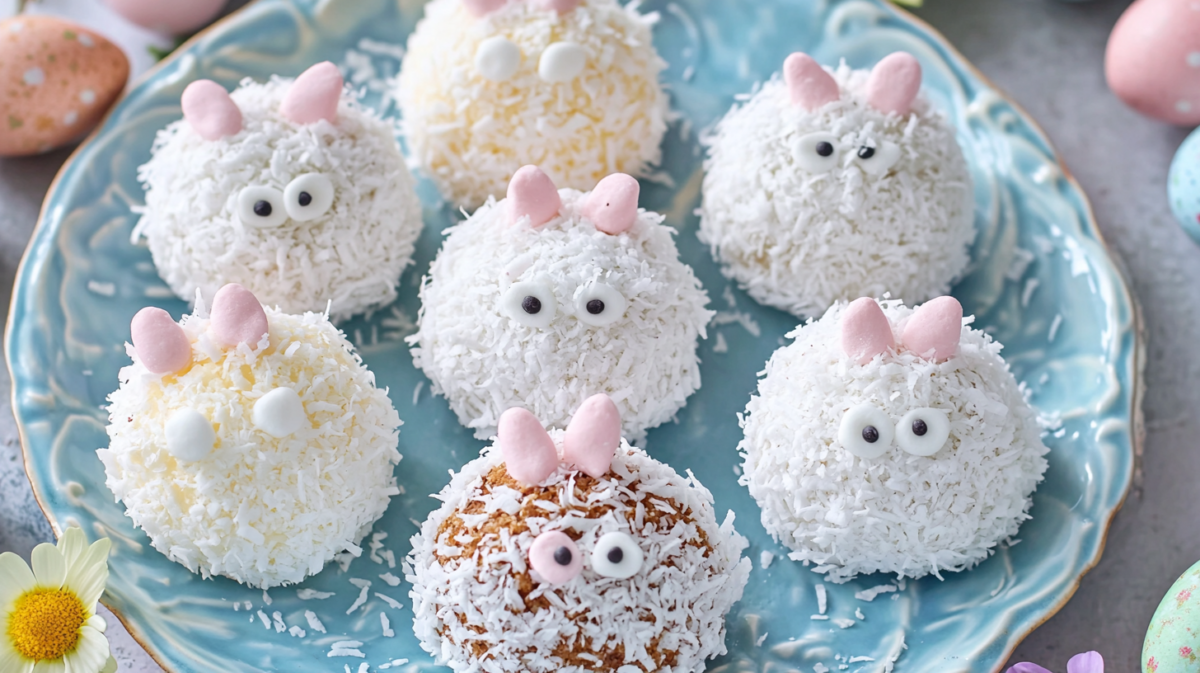
These adorable Easter Bunny Coconut Tails are the perfect festive treat for your holiday celebration! Cute, delicious, and fun to make with kids, these sweet coconut treats will be the highlight of your Easter dessert table.
Ingredients
For the coconut balls:
- 3 cups sweetened shredded coconut
- 1 can (14 oz) sweetened condensed milk
- 1 teaspoon vanilla extract
- 1/4 teaspoon almond extract (optional)
- 1/8 teaspoon salt
For decorating:
- 2 cups white chocolate chips or melting wafers
- Additional shredded coconut for coating (about 1 cup)
- Pink food coloring
- Mini marshmallows (for tails)
- Edible candy eyes
- Pink candy melts or white chocolate tinted pink (for ears and noses)
- Black edible marker or black icing for whiskers
Instructions
- In a large bowl, combine the shredded coconut, sweetened condensed milk, vanilla extract, almond extract (if using), and salt. Mix until well incorporated.
- Cover the mixture and refrigerate for at least 1 hour to firm up.
- Line a baking sheet with parchment paper. Once chilled, use a cookie scoop or tablespoon to portion the coconut mixture. Shape into egg-shaped forms for the bunny bodies.
- Place the shaped coconut balls back in the refrigerator for another 30 minutes to firm up again.
- Meanwhile, tint about 1/3 cup of the shredded coconut pink using a few drops of food coloring. Mix well and set aside.
- Melt the white chocolate in a microwave-safe bowl in 30-second intervals, stirring between each until smooth.
- Dip each chilled coconut ball into the melted white chocolate, coating completely. Allow excess to drip off.
- While the chocolate is still wet, attach a mini marshmallow to the back of each bunny for the tail.
- Roll some bunnies in white coconut and some in the pink-tinted coconut.
- Place them back on the parchment paper and add candy eyes.
- Melt a small amount of pink candy melts or tinted white chocolate and use a piping bag to create small ear shapes on wax paper. Once set, attach these to the tops of the bunnies.
- Use the same pink melting chocolate to add tiny noses.
- Once everything is set, use a black edible marker or thin black icing to draw whiskers.
- Allow to set completely before serving.
Storage
Store your Easter Bunny Coconut Tails in an airtight container in the refrigerator for up to 1 week. Allow them to sit at room temperature for about 10 minutes before serving for the best texture and flavor.
Tips
- For a festive presentation, arrange your bunnies on a bed of green-tinted coconut “grass.”
- Add small jelly beans around your display for colorful “Easter eggs.”
- You can use different colors of coconut coating to create a variety of bunny colors.
- For a less sweet version, use unsweetened shredded coconut in the mixture.
Variations for Easter Bunny Coconut Tails
Here are some delicious variations to customize your Easter Bunny Coconut Tails:

Flavor Variations
Chocolate Coconut Bunnies
- Add 3 tablespoons of cocoa powder to the coconut mixture
- Use milk or dark chocolate for dipping instead of white chocolate
- Add a sprinkle of chocolate shavings to the coating
Lemon Coconut Bunnies
- Add 1 tablespoon of lemon zest and 1 tablespoon of lemon juice to the mixture
- Mix a little yellow food coloring into the coconut coating
- Use lemon-flavored white chocolate for dipping (add ¼ teaspoon lemon oil to white chocolate)
Strawberry Coconut Bunnies
- Mix 2 tablespoons of freeze-dried strawberry powder into the coconut mixture
- Use strawberry-flavored white chocolate or add strawberry extract to regular white chocolate
- Roll in pink-tinted coconut mixed with crushed freeze-dried strawberries
Dietary Variations
Vegan Coconut Bunnies
- Replace sweetened condensed milk with 1 can of full-fat coconut milk reduced to half its volume, plus 3 tablespoons of maple syrup
- Use vegan white chocolate for coating
- Substitute vegan marshmallows for the tails
Reduced Sugar Option
- Use unsweetened shredded coconut
- Replace half the sweetened condensed milk with cream cheese (8 oz)
- Use sugar-free white chocolate or dark chocolate with higher cocoa percentage
Presentation Variations
Bunny Family
- Make different sizes of bunnies (small, medium, large) to create a bunny family
- Use different colored coconut coatings for variety
- Arrange them in family groupings on your dessert platter
Easter Basket Bunnies
- Create small chocolate “baskets” using melted chocolate piped into basket shapes
- Place a finished bunny in each basket
- Add small jelly beans around the bunny as “eggs”
Coconut Bunny Pops
- Insert a lollipop stick into each bunny before chilling
- Decorate as directed in the original recipe
- Display in a decorative container filled with Easter grass
These variations allow you to customize your Easter Bunny Coconut Tails to suit different preferences and dietary needs while maintaining their adorable appearance and delicious taste!
Advanced Techniques & Additions
Marbled Bunny Tails
- After melting white chocolate for dipping, divide into small portions
- Add different food colorings to each portion and lightly swirl together
- Dip coconut balls for a beautiful marbled effect
Filled Surprise Bunnies
- Before shaping the coconut mixture, make an indentation
- Fill with a small amount of jam, caramel, or chocolate ganache
- Close the coconut mixture around the filling before chilling
Coconut Bunny Truffles
- Add 4 oz of softened cream cheese to the original mixture
- Roll in crushed nuts instead of coconut for variation
- Drizzle with contrasting chocolate after setting
Seasonal & Holiday Adaptations
Christmas Coconut Snowballs
- Shape into perfect rounds instead of egg shapes
- Skip the bunny features and roll in sparkling sugar
- Decorate with red and green sprinkles or drizzle
Halloween Coconut Ghosts
- Shape into tall ovals instead of egg shapes
- Dip in white chocolate and skip the coconut coating
- Use chocolate chips for eyes and mouth
Valentine’s Day Hearts
- Shape coconut mixture into hearts
- Dip in pink or red-tinted white chocolate
- Decorate with heart-shaped sprinkles
Serving Suggestions
Coconut Bunny Parfaits
- Layer crushed coconut bunnies with vanilla pudding and berry compote
- Top with whipped cream and coconut shavings
- Serve in clear glasses for a beautiful presentation
Bunny Tail Ice Cream
- Crumble coconut bunnies over vanilla ice cream
- Add a drizzle of caramel or chocolate sauce
- Sprinkle with toasted coconut flakes
Easter Brunch Display
- Place bunnies on a tiered serving tray with fresh berries
- Surround with edible flowers and mint leaves
- Add chocolate eggs and pastel-colored macarons for a complete Easter dessert display
These additional variations and serving ideas will help you transform your Easter Bunny Coconut Tails into versatile treats that can be enjoyed throughout the year or customized for any special occasion!
Alternative Shapes & Designs
Coconut Easter Eggs
- Shape the coconut mixture into egg forms instead of bunnies
- Dip in pastel-colored white chocolate
- Decorate with contrasting drizzles and sprinkles
Chicks
- Shape the mixture into small round balls for chick bodies
- Use yellow-tinted coconut for coating
- Add orange candy melts for beaks and black sugar pearls for eyes
Carrots
- Shape mixture into carrot forms (cone shapes)
- Dip in orange-tinted white chocolate
- Add green candy melts piped in thin lines for carrot tops
International Flavor Inspirations
Coconut Lime (Caribbean Inspired)
- Add 1 tablespoon lime zest and 2 teaspoons lime juice to the mixture
- Mix in 2 tablespoons finely chopped fresh mint
- Roll in lime-sugar (sugar mixed with lime zest)
Chai Spiced (Indian Inspired)
- Add 1 teaspoon each of cinnamon, cardamom, and ginger
- Mix in a pinch of cloves and black pepper
- Roll in cinnamon-sugar mixture after dipping
Matcha Coconut (Japanese Inspired)
- Add 1 tablespoon matcha powder to the coconut mixture
- Use white chocolate with a touch of matcha for dipping
- Sprinkle with black sesame seeds as an accent
Gift Packaging Ideas
Easter Egg Box Presentation
- Place finished bunnies in decorative Easter egg boxes
- Line with colorful tissue paper or Easter grass
- Add a personalized tag with ingredients and storage instructions
Mason Jar Gifts
- Layer coconut bunnies with colorful tissue in small mason jars
- Tie with pastel ribbon and add a decorative tag
- Include serving suggestions on the back of the tag
Easter Basket Fillers
- Individually wrap bunnies in clear cellophane
- Tie with pastel ribbons
- Include as gourmet treats in Easter baskets
Tips for Working with Children
Kid-Friendly Adaptations
- Pre-measure ingredients for little helpers
- Use silicone molds for easier shaping
- Set up a decorating station with different toppings in small bowls
Educational Aspects
- Teach color mixing with the food coloring
- Practice counting and measuring with the ingredients
- Discuss the science of melting and setting chocolate
These additional ideas will help you expand your creativity with the Easter Bunny Coconut Tails recipe and provide numerous options for customization throughout the year!
Troubleshooting Tips
Mixture Too Sticky
- Add more shredded coconut, 2 tablespoons at a time
- Chill the mixture longer before shaping
- Lightly coat your hands with powdered sugar when shaping
Chocolate Coating Issues
- If chocolate is too thick, add 1 teaspoon of coconut oil
- If chocolate seizes, start over with fresh chocolate
- For smoother coating, add a touch of shortening to the melted chocolate
Decorations Not Sticking
- Apply decorations immediately after dipping while chocolate is still wet
- Use a small dab of additional melted chocolate as “glue”
- Gently press decorations into place and hold for a few seconds
Make-Ahead Options
Freezing Instructions
- Freeze shaped coconut balls before coating for up to 2 months
- Store in airtight containers with parchment between layers
- Thaw in refrigerator before dipping and decorating
Staged Preparation
- Make coconut mixture up to 3 days ahead
- Shape and refrigerate balls the day before decorating
- Complete final decorations within 24 hours of serving
Professional Finishing Touches
Gold & Silver Accents
- Brush with edible gold or silver dust for elegant appeal
- Add small touches of edible metallic paint for eyes or whiskers
- Use metallic sprinkles for high-end presentation
Airbrushing Technique
- Use food-safe airbrush colors for gradient effects
- Create ombré looks by fading colors from top to bottom
- Add delicate patterns using stencils and airbrush colors
Hand-Painted Details
- Use food coloring mixed with a drop of vodka for paint
- Paint delicate flowers or designs on white chocolate coating
- Add personalized details like names or messages
Themed Collections
Storybook Bunnies
- Create bunnies with different expressions (happy, sleepy, silly)
- Add clothing details with colored white chocolate
- Display with small book-shaped cookies with Easter stories
Bunny Garden Party
- Create a display with coconut “grass”
- Add fondant flowers and chocolate mushrooms
- Include sugar cookie butterflies and ladybugs
Woodland Easter Scene
- Include other woodland creatures (foxes, hedgehogs) using the same technique
- Create chocolate trees and bushes for display
- Add edible moss and stone effects using crushed cookies and edible paint
These additional tips, techniques, and creative ideas will help you master the art of making Easter Bunny Coconut Tails and expand them into impressive themed displays that will delight family and friends at your Easter celebration!
Frequently Asked Questions
General Questions
Q: How far in advance can I make these Easter Bunny Coconut Tails?
A: You can make the coconut mixture up to 3 days ahead and store it in the refrigerator. The shaped but uncoated bunnies can be refrigerated for 2 days. Once fully decorated, they’re best enjoyed within 5-7 days when stored properly.
Q: Can I freeze these treats?
A: Yes! The shaped coconut balls can be frozen for up to 2 months before coating. After decorating, they can be frozen for up to 1 month, though some decorations may lose their appearance when thawed.
Q: Are these too sweet? Can I reduce the sugar?
A: These are definitely sweet treats. To reduce sweetness, use unsweetened shredded coconut, replace some of the condensed milk with cream cheese, or use dark chocolate instead of white chocolate for coating.
Ingredient Questions
Q: Can I use coconut cream instead of sweetened condensed milk?
A: Coconut cream alone won’t provide the right consistency. If substituting, reduce 1 can of coconut milk by half its volume and add 3-4 tablespoons of sweetener.
Q: What can I use instead of food coloring?
A: Natural alternatives include beetroot powder for pink, matcha for green, turmeric for yellow, and freeze-dried fruit powders for various colors.
Q: My grocery store doesn’t sell candy eyes. What can I use instead?
A: You can create eyes using small dots of dark chocolate, chocolate chips, or cut small circles from dried fruits like raisins.
Technique Questions
Q: Why is my white chocolate seizing when I try to melt it?
A: White chocolate is sensitive to heat and moisture. Ensure your bowl and utensils are completely dry, use low heat, and never add cold liquids to melted chocolate.
Q: The coconut mixture is too sticky to shape. What should I do?
A: Refrigerate the mixture longer (at least 2 hours) or add more coconut, 2 tablespoons at a time, until it reaches a moldable consistency.
Q: How do I get the decorations to stick properly?
A: Apply decorations while the chocolate coating is still wet. If it’s already set, use a small dab of melted chocolate as “glue” to attach decorations.
Dietary Considerations
Q: How can I make these gluten-free?
A: Good news! The basic recipe is naturally gluten-free. Just verify that your white chocolate and decorative elements are certified gluten-free.
Q: Can these be made dairy-free?
A: Yes, use coconut condensed milk (available commercially or homemade) and dairy-free white chocolate alternatives.
Q: How many calories are in each bunny tail?
A: Each coconut bunny contains approximately 220-250 calories, depending on size and specific decorations used.
Conclusion
Easter Bunny Coconut Tails are more than just a delicious treat—they’re a creative canvas that brings joy and festivity to your Easter celebration. Their versatility allows for endless customization to suit any taste preference, dietary need, or skill level.
These adorable treats serve as both a delightful activity to make with loved ones and a memorable addition to your Easter dessert table. The combination of sweet coconut, smooth chocolate, and playful decorations creates a treat that’s as fun to admire as it is to eat.
Whether you’re a seasoned baker looking for a new Easter tradition or a beginner seeking a simple yet impressive holiday recipe, these coconut bunnies deliver both satisfaction and smiles. Their make-ahead capability also makes them perfect for busy holiday preparations.
We hope these Easter Bunny Coconut Tails become a beloved part of your Easter celebration for years to come. Happy baking and Happy Easter!