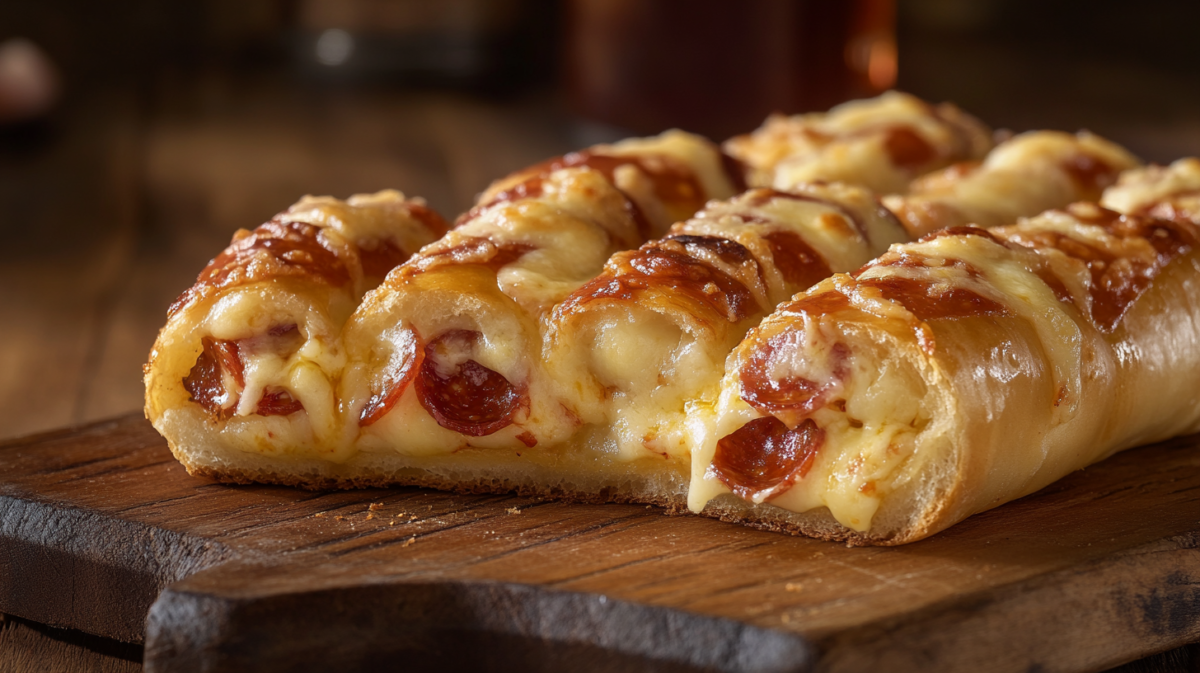
If you love pizza and garlic bread, why choose between them? These pizza-stuffed garlic breadsticks combine the best of both worlds – a soft, garlicky bread exterior with all your favorite pizza toppings and melty cheese tucked inside. They’re perfect for game day, movie night, or anytime you need a crowd-pleasing appetizer that’s sure to impress!
Why You’ll Love This Recipe
- Two-in-One Comfort Food: Enjoy the flavors of both pizza and garlic bread in every bite – no need to choose between favorites!
- Customizable to Perfection: Easily adapt the fillings to suit picky eaters or showcase seasonal ingredients.
- Make-Ahead Friendly: Prepare in advance and bake when needed – perfect for busy weeknights or entertaining.
- Portable and Portion-Controlled: Each breadstick is a self-contained serving, making them ideal for gatherings or kids’ lunches.
- Impressive Presentation: The spiral design creates a beautiful cross-section that looks professionally made with minimal effort.
- Versatile Serving Options: Works as an appetizer, side dish, or main course depending on how you serve it.
- Kid-Approved: The fun format and familiar flavors make these breadsticks a hit with children while still appealing to adult tastes.
- Freezer-Friendly: Excellent for meal prep – make a double batch and freeze for future quick meals.
- No Special Equipment Needed: Requires only basic kitchen tools and baking sheets – no specialty pans required.
- Satisfying Texture Contrast: Crispy exterior, soft bread layer, and gooey cheese filling create the perfect bite every time.
Ingredients
Dough:
- 2 cups all-purpose flour
- 1 package (2¼ tsp) active dry yeast
- 1 tsp sugar
- 1 tsp salt
- ¾ cup warm water (110-115°F)
- 2 tbsp olive oil
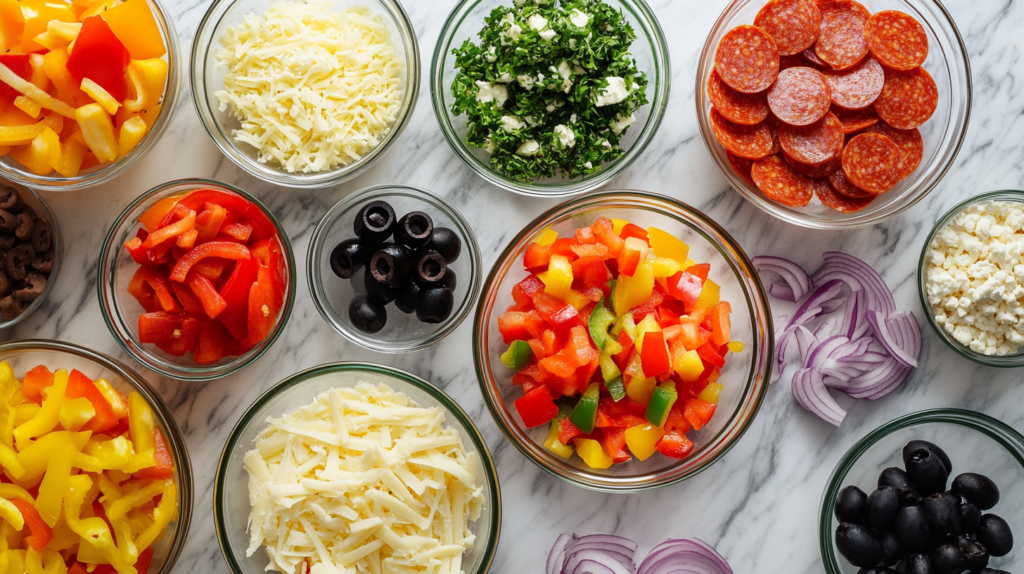
Filling:
- 1 cup pizza sauce
- 1½ cups shredded mozzarella cheese
- ½ cup shredded provolone cheese
- ½ cup mini pepperoni slices
- ¼ cup diced bell peppers
- ¼ cup diced red onion
- 2 tbsp sliced black olives
- 1 tsp Italian seasoning
Garlic Butter Topping:
- 4 tbsp butter, melted
- 3 cloves garlic, minced
- 1 tbsp fresh parsley, chopped
- ½ tsp Italian seasoning
- ¼ cup grated Parmesan cheese
Instructions
Prepare the Dough
- In a large bowl, combine flour, yeast, sugar, and salt.
- Add warm water and olive oil, then mix until a soft dough forms.
- Knead on a floured surface for 5-7 minutes until smooth and elastic.
- Place in an oiled bowl, cover with a damp cloth, and let rise in a warm place for about 45 minutes, or until doubled in size.
Prepare the Filling
- While the dough rises, combine the mozzarella and provolone cheeses in a bowl.
- In a separate bowl, mix pepperoni, bell peppers, red onion, black olives, and Italian seasoning.
Assemble and Bake
- Preheat your oven to 400°F (200°C) and line a baking sheet with parchment paper.
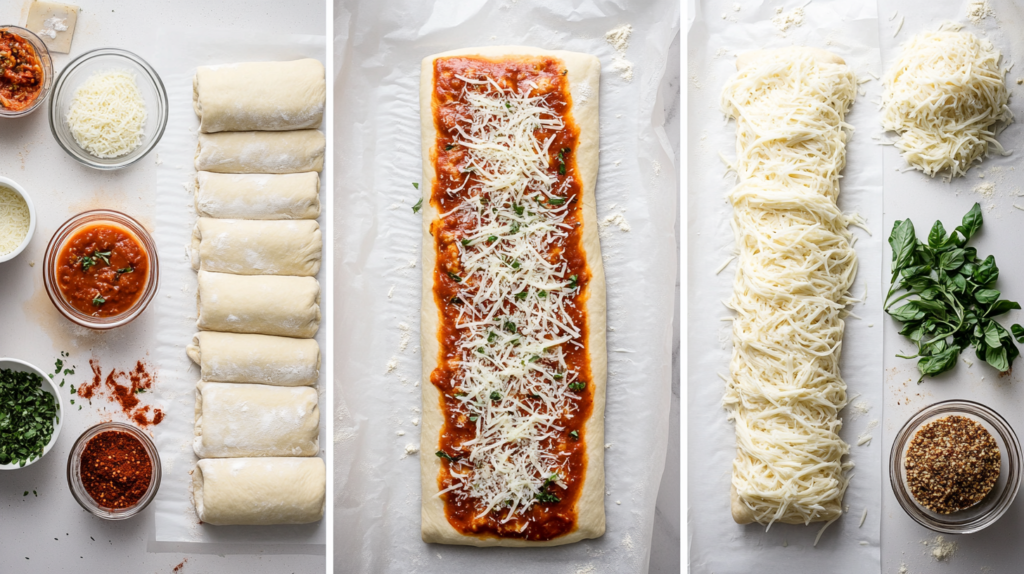
- Punch down the risen dough and roll it out on a floured surface into a large rectangle, approximately 12×16 inches.
- Spread a thin layer of pizza sauce over the dough, leaving a 1-inch border around the edges.
- Sprinkle half of the cheese mixture over the sauce.
- Distribute the pepperoni and vegetable mixture evenly over the cheese.
- Top with the remaining cheese.
- Starting from the long edge, carefully roll the dough into a tight log.
- Pinch the seam and edges to seal in the filling.
- Using a sharp knife, cut the log into 12 equal pieces.
- Place the pieces cut-side up on the prepared baking sheet, leaving some space between each.
- Bake for 15-18 minutes, or until golden brown.
Add the Garlic Butter Topping
- While the breadsticks are baking, prepare the garlic butter by combining melted butter, minced garlic, parsley, and Italian seasoning.
- When the breadsticks come out of the oven, immediately brush them with the garlic butter mixture.
- Sprinkle with Parmesan cheese while still hot.
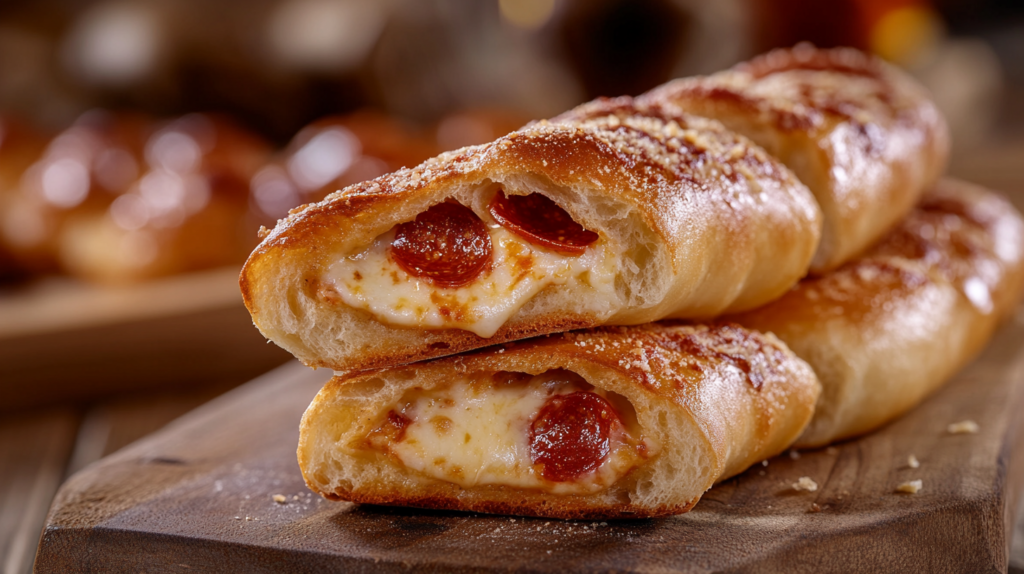
Serving Suggestions
Serve these pizza-stuffed garlic breadsticks warm with extra pizza sauce for dipping. They’re perfect as an appetizer, side dish, or even a main course paired with a fresh salad!
Storage and Reheating
These breadsticks are best enjoyed fresh from the oven, but any leftovers can be stored in an airtight container in the refrigerator for up to 3 days.
Comprehensive Reheating Instructions:
Oven Method (Best Results):
- Preheat your oven to 350°F (175°C)
- Place breadsticks on a baking sheet lined with parchment paper
- For 1-4 breadsticks: Reheat for 5-7 minutes
- For 5-8 breadsticks: Reheat for 7-9 minutes
- For 9+ breadsticks: Reheat for 9-12 minutes
- To restore moisture, lightly brush with olive oil or butter before reheating
Microwave Method (Quick Option):
- Place 1-2 breadsticks on a microwave-safe plate
- Cover with a slightly damp paper towel
- Heat for 20-30 seconds, then in additional 10-second intervals until warmed through
- Note: This method won’t maintain the crispy exterior but works in a pinch
Air Fryer Method:
- Preheat air fryer to 325°F (165°C)
- Place breadsticks in a single layer (2-4 at a time depending on air fryer size)
- Reheat for 3-4 minutes until crispy and warmed through
For Frozen Breadsticks: If you’ve frozen your leftovers, add 5-7 minutes to the oven reheating time (no need to thaw first), or thaw in the refrigerator overnight before using the other methods.
Quantity Recommendations:
- For appetizers: Plan on 2-3 breadsticks per person
- For a main dish: 4-5 breadsticks per person, served with a side salad
- For a party of 4-6 people: Make a full batch (12 breadsticks)
- For a party of 8-12 people: Double the recipe (24 breadsticks)
- For larger gatherings: Triple the recipe and prepare in batches
Recipe Tips
- Make Ahead Option: Prepare the breadsticks up to the point of baking, then refrigerate for up to 24 hours. Allow them to come to room temperature for 20 minutes before baking.
- Customize Your Fillings: Feel free to swap in your favorite pizza toppings! Try adding cooked Italian sausage, mushrooms, or even pineapple for a Hawaiian twist.
- Cheese Advice: For the best melty texture, grate your own cheese rather than using pre-shredded packages which contain anti-caking agents.
- Dough Shortcut: In a pinch, you can use refrigerated pizza dough instead of making your own.
Frequently Asked Questions
Can I make these breadsticks gluten-free?
Yes! You can substitute the all-purpose flour with a 1:1 gluten-free flour blend. Look for one that contains xanthan gum for best results. The texture may be slightly different, but they’ll still be delicious. You might need to add an extra tablespoon or two of water as gluten-free flours tend to absorb more moisture.
How do I prevent the filling from leaking out?
Make sure not to overfill the dough and leave that 1-inch border around all edges. When rolling, roll tightly but gently, and firmly pinch all seams to seal well. If you notice any tears in the dough, patch them with a small piece of extra dough before baking.
Can I freeze these breadsticks?
Absolutely! You can freeze them either before or after baking:
- Before baking: Prepare up to the cutting stage, freeze on a baking sheet until solid, then transfer to a freezer bag. When ready to bake, allow to thaw in the refrigerator overnight, then bring to room temperature for 30 minutes before baking.
- After baking: Cool completely, wrap individually in plastic wrap, then store in a freezer bag for up to 2 months. Reheat following the frozen breadstick instructions in the reheating section.
My dough isn’t rising properly. What went wrong?
Check that your yeast is fresh and active. The water temperature should be warm (110-115°F) – too hot will kill the yeast, too cool won’t activate it. Also, ensure you’re letting the dough rise in a warm, draft-free environment. If your kitchen is cold, try placing the covered dough in an oven that’s turned off but with the light on.
Can I make these breadsticks ahead for a party?
Yes! You have several options:
- Prepare the dough and fillings separately up to 24 hours ahead and assemble before baking.
- Assemble completely and refrigerate unbaked for up to 24 hours.
- Bake them 2-3 hours before serving and reheat briefly before serving.
- Fully bake, cool, and freeze up to 2 weeks ahead, then thaw and reheat the day of your event.
What dipping sauces go well with these breadsticks?
While extra pizza sauce is the classic choice, these breadsticks also pair wonderfully with:
- Garlic aioli
- Ranch dressing
- Marinara sauce
- Alfredo sauce
- Pesto
- Buffalo sauce
- Spicy honey
Can I make these in an air fryer?
Yes! Work in batches of 3-4 breadsticks at a time. Preheat your air fryer to 350°F and cook for 8-10 minutes, until golden brown and cooked through. You may need to adjust timing based on your specific air fryer model.
Related Recipes:
Additional Recipes to Try
If you enjoyed making Pizza-Stuffed Garlic Breadsticks, you might love exploring more delicious and easy-to-make recipes. For a classic Italian twist, try this Homemade Chicago-Style Deep Dish Pizza, which features a thick, buttery crust and rich tomato sauce. Looking for a cheesy delight? These Garlic Butter Chicken Balls with Creamy Parmesan Pasta are a must-try for any comfort food lover. If you’re a fan of stuffed dishes, these Air Fryer Cheesy Taco Bombs deliver a crispy, gooey bite of taco goodness. For those who love creamy, cheesy comfort food, the Creamy Alfredo Lasagna Soup offers a unique way to enjoy lasagna flavors in a bowl. And if you’re in the mood for something fresh and savory, these Cheesy Garlic Chicken Wraps make a perfect quick meal option. Enjoy experimenting with these recipes and take your cooking to the next level! 🍕🧄🧀
Conclusion
These Pizza-Stuffed Garlic Breadsticks represent the best of both worlds – combining the irresistible flavor of pizza with the comforting appeal of fresh garlic breadsticks. They’re versatile enough to star as a crowd-pleasing appetizer at your next gathering, a fun weekend lunch, or a creative side to accompany your favorite pasta dishes.
What makes this recipe truly special is how easily you can customize it to suit your preferences or what you have on hand. The simple homemade dough creates a wonderfully soft texture with a garlic-buttery finish that elevates these breadsticks beyond ordinary pizza rolls.
Whether you’re an experienced baker or trying your hand at homemade dough for the first time, these detailed instructions will guide you to success. The make-ahead options make them perfect for busy households, and the comprehensive reheating instructions ensure they’ll taste just as delicious the second time around.
We’d love to hear how your Pizza-Stuffed Garlic Breadsticks turned out and what creative filling combinations you tried! Share your experience in the comments below and don’t forget to save this recipe for your next movie night or game day gathering.
Enjoy this perfect combination of two favorite foods in one delicious, portable package!