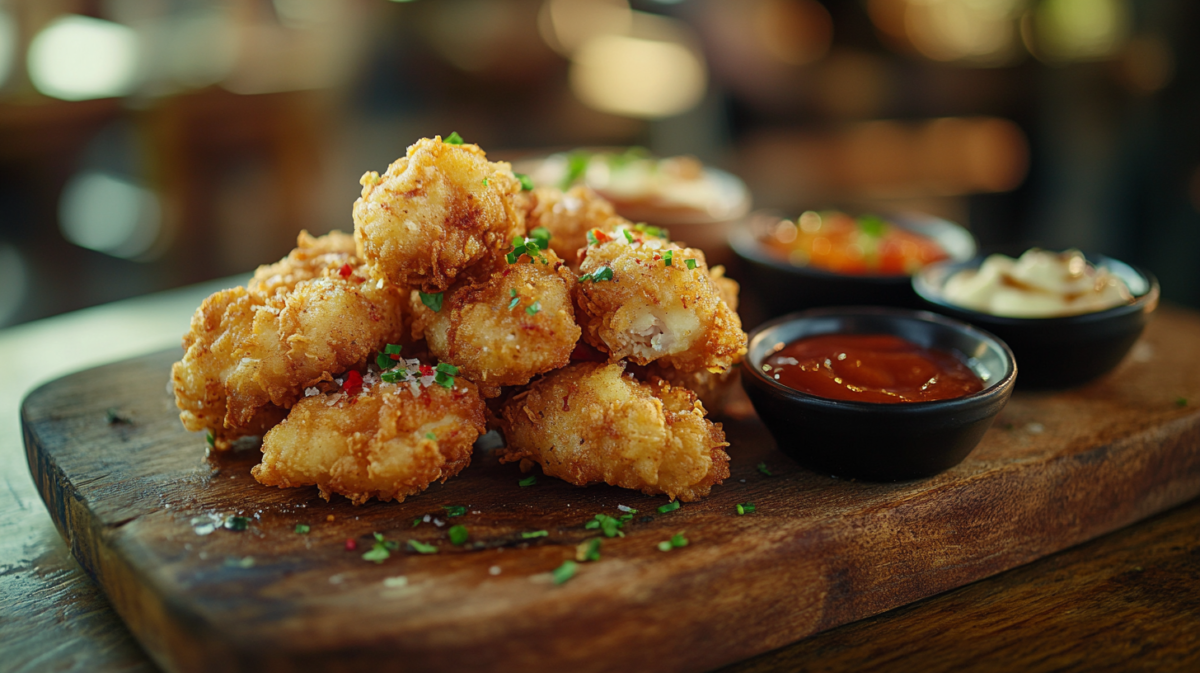
Golden-crisp on the outside, juicy and tender on the inside – these homemade fried chicken tenders are absolutely irresistible! Skip the freezer aisle and treat yourself to the real deal. These crispy strips of heaven come together quickly with simple ingredients you probably already have in your pantry. Perfect for a family dinner, game day snack, or whenever that craving for something deliciously crunchy hits!
Why You’ll Love This Recipe
Trust me, once you make these chicken tenders from scratch, there’s no going back to the frozen stuff! The seasoned coating gets perfectly crispy while keeping all the juiciness locked inside the chicken. They’re easier than you might think and taste a million times better than anything from a drive-thru. Plus, you control the ingredients – no mystery additives here! Kids absolutely devour these, and let’s be honest, adults do too. They’re perfect for dipping in your favorite sauce and guaranteed to disappear fast.
Ingredients
Chicken breasts – The star of the show! Look for boneless, skinless breasts that you’ll slice into tender-sized strips.
Flour – Creates the base of our crispy coating and helps the egg wash stick.
Eggs – Acts as the glue that holds our breadcrumb mixture to the chicken.
Panko breadcrumbs – The secret to that spectacular crunch! These Japanese-style breadcrumbs are lighter and airier than regular breadcrumbs.
Seasonings – A blend of garlic powder, paprika, salt, and pepper to give amazing flavor to every bite.
Oil – For frying the tenders to golden perfection.
Buttermilk – An optional marinade that tenderizes the chicken and adds incredible flavor.
How to Make Perfect Fried Chicken Tenders
Getting these tenders just right is easier than you might think! I’ll walk you through every step to ensure crispy, juicy perfection.
- Prep your chicken: Start by slicing your chicken breasts into even strips about 1-inch wide. Try to keep them similar in size so they cook evenly.
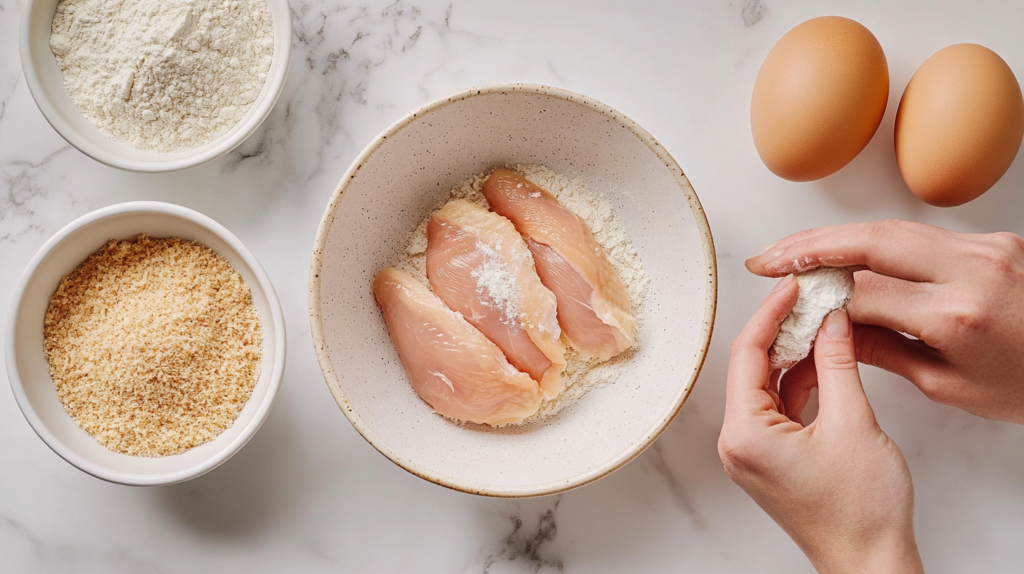
- Set up your dredging station: This is the fun part! Arrange three shallow dishes – one with seasoned flour, one with beaten eggs, and one with seasoned panko breadcrumbs.
- Coat the chicken: Working one piece at a time, dredge each tender in flour, then egg wash, then panko, pressing gently to help the breadcrumbs adhere.
- Let them rest: Place your coated tenders on a wire rack for about 10 minutes. This little break helps the coating stick better during frying.
- Fry to perfection: Heat your oil to 350°F and carefully add a few tenders at a time, being careful not to overcrowd. Fry until golden brown and cooked through, about 3-4 minutes per side.
Tips for Crispy Success
Want to take your chicken tenders to the next level? Here are some game-changing tips:
- Marinate in buttermilk: For extra tender chicken, soak your strips in buttermilk for at least 30 minutes (or up to overnight in the fridge).
- Double-dredge for extra crunch: For an even thicker, crunchier coating, repeat the flour-egg-breadcrumb process twice!
- Check your oil temperature: Too cool and your tenders will be greasy; too hot and they’ll burn before cooking through. A thermometer is your best friend here.
- Keep them warm: Hold finished tenders in a 200°F oven while you finish the batch to keep everything hot and crispy.
Serving Ideas
These crispy delights are incredibly versatile! Serve them with:
- Honey mustard, ranch, or buffalo sauce for dipping
- Alongside fresh-cut fries for a classic combo
- On a salad for added protein
- In a wrap with lettuce, tomato and your favorite sauce
Storage Tips
These tenders are best enjoyed fresh from the fryer, but if you have leftovers, store them in an airtight container in the refrigerator for up to 3 days. Reheat in a 375°F oven until hot and crispy again. Trust me, they make incredible next-day lunch!
Make Ahead Options
Want to prep these tenders in advance? You’ve got options!
Prep the coating: Mix your dry ingredients ahead of time and store in airtight containers until you’re ready to cook.
Freeze uncooked tenders: After coating, place tenders on a baking sheet and freeze until solid, then transfer to freezer bags. They’ll keep for up to 3 months! When ready to cook, fry directly from frozen, adding a few extra minutes to the cooking time.
Batch cooking: Make a double batch and freeze some after cooking for quick meals later. Reheat frozen cooked tenders in a 375°F oven until hot and crispy.
Healthier Alternatives
Craving chicken tenders but want a lighter option? I’ve got you covered:
Oven-baked version: After coating, place tenders on a wire rack over a baking sheet. Spray with cooking oil and bake at 425°F for 15-20 minutes until golden and cooked through.
Air fryer method: Cook at 380°F for about 12 minutes, flipping halfway through. You’ll get amazing crispiness with just a fraction of the oil!

Why Homemade Is Worth It
There’s something special about making these from scratch. Not only do you avoid preservatives and excess sodium found in restaurant versions, but the flavor is incomparable! Plus, there’s that satisfaction of creating something delicious with your own hands. The smiles around your table will tell you it was absolutely worth the effort.
These crispy, juicy chicken tenders are sure to become a regular request in your home. They’re simple enough for weeknight dinners but special enough to make any meal feel like a treat. Give them a try, and I guarantee they’ll earn a permanent spot in your recipe collection!
Frequently Asked Questions
Can I use chicken thighs instead of breasts?
Absolutely! Chicken thighs work beautifully and actually stay even juicier. Just trim excess fat and cut into strips. The flavor is a bit richer, which many people prefer!
My coating keeps falling off during frying. Help!
This happens to the best of us! Make sure to: 1) Pat the chicken completely dry before starting, 2) Let the coated tenders rest for 10-15 minutes before frying to help the coating adhere, and 3) Don’t flip them too early – let that crust set before turning.
What’s the best oil for frying chicken tenders?
Vegetable oil, canola oil, or peanut oil all work well because of their high smoke points. I personally prefer peanut oil for its subtle flavor, but any neutral oil with a high smoke point will do the trick.
How do I know when they’re done?
Chicken is safely cooked when it reaches an internal temperature of 165°F. If you don’t have a thermometer, cut into the thickest part – the meat should be opaque white with no pink.
Can I make these gluten-free?
You sure can! Simply substitute the regular flour with your favorite gluten-free flour blend and use gluten-free panko breadcrumbs. The results are just as delicious!
Perfect Pairings
Make it a meal to remember by serving these crispy tenders with:
- Creamy coleslaw for a perfect cooling contrast
- Mac and cheese for the ultimate comfort food combo
- Sweet potato fries for a colorful twist on a classic
- Corn on the cob with herb butter for a summer feast
Whether you’re making these for picky eaters, a casual get-together, or just because you deserve something delicious tonight, these homemade chicken tenders are guaranteed to bring joy to your table. They’ve become a staple in my kitchen, and I bet they will in yours too!
Remember, cooking should be fun, so don’t stress if they don’t look picture-perfect the first time. Each batch gets better, and even the “imperfect” ones taste amazing. Enjoy the process, and most importantly, enjoy every crispy, tender bite!
A Note On Seasonings
Don’t be afraid to get creative with your seasoning blend! While the classic combination I’ve shared gives you that perfect, crowd-pleasing flavor, here are some delicious variations to try:
Cajun-style: Add cayenne pepper, onion powder, and dried thyme for a spicy Southern kick.
Italian-inspired: Mix in dried oregano, basil, and a touch of grated parmesan cheese in your breadcrumbs.
Ranch lovers: Incorporate dried dill, parsley, and a ranch seasoning packet into your flour mixture.
Sweet and spicy: Add a tablespoon of brown sugar and a pinch of cayenne to your seasoning blend for an irresistible contrast.
The beauty of making these at home is that you can tailor them exactly to your taste preferences. My family loves when I make different variations and set up a “tenders bar” with various dipping sauces!
Kid-Friendly Cooking
These chicken tenders make a perfect cooking project with children! Here’s how to involve the little ones:
- Let kids help slice the chicken (with supervision and kid-safe knives for younger chefs)
- Have them mix the breadcrumb coating and seasonings
- Set up an assembly line where they can dip the chicken through each station
Not only does this teach valuable cooking skills, but kids are much more likely to eat (and love!) food they’ve helped prepare. Just be sure an adult handles the hot oil portion of the cooking.
Final Thoughts
There’s something deeply satisfying about mastering a simple comfort food like chicken tenders. When made with care and quality ingredients, this humble dish transforms into something truly special that brings people together around the table.
I still remember the first time I made these from scratch – the look of surprise and delight on everyone’s faces when they tasted the difference compared to the frozen variety. It’s those moments that remind me why I love cooking and sharing recipes like this one with you.
So heat up that oil, gather your ingredients, and get ready to enjoy chicken tenders the way they were meant to be – fresh, flavorful, and made with love in your own kitchen!
Related Recipes to Enhance Your Fried Chicken Tenders Experience
If you love crispy and flavorful chicken, why not explore other delicious dishes that complement your Fried Chicken Tenders Recipe? Try the Air Fryer Honey Butter Garlic Chicken Tenders for a sweet and savory twist, or enjoy a lighter meal with Grilled Chicken Broccoli Bowls with Creamy Garlic Sauce. For a spicy kick, check out the Street Corn Chicken Rice Bowl, while Garlic Butter Chicken Balls with Creamy Parmesan Pasta is a great choice for a comforting meal. Lastly, if you’re in the mood for something quick and cheesy, these Cheesy Garlic Chicken Wraps are perfect for a satisfying bite!